Introduction
Hot chocolate bombs are all the rage, and it’s easy to see why! These delicious chocolate spheres, filled with cocoa powder and marshmallows, are not just a treat but a whole experience. Imagine the joy of dropping one into a cup of hot milk and watching it melt into a creamy, rich drink—it’s like magic in a mug. As the holidays approach, hot chocolate bombs have become a popular choice for gifts, cozy nights at home, or simply adding a touch of indulgence to your routine.
Whether you’re an experienced baker or a beginner in the kitchen, these treats are surprisingly easy to make. They’re also endlessly customizable, which makes them perfect for any occasion beyond the holiday season. From festive decorations to unique flavor combinations, there’s so much you can do to make these bombs your own. In this guide, we’ll walk you through everything you need to know—from the basic ingredients to advanced tips for creating professional-quality hot chocolate bombs. Let’s dive in and discover the fun of making this exciting treat together!
Print
Hot Chocolate Bombs for Holidays and Beyond: A Fun Guide
- Total Time: 30 minutes
- Yield: 6 hot chocolate bombs 1x
Description
These hot chocolate bombs are not just a cozy treat but also a magical experience! Chocolate shells filled with cocoa mix and marshmallows melt into a rich, creamy drink when hot milk is poured over them—perfect for holidays, gifts, or everyday indulgence.
Ingredients
- 2 cups high-quality chocolate (milk, dark, or white)
- 1 cup hot cocoa mix
- 1 cup mini marshmallows
- Optional: crushed peppermint candies, caramel bits, or cinnamon
- Decorations: sprinkles, edible glitter, or candy drizzle
Instructions
- Melt chocolate using either microwave (15-second intervals) or double boiler method.
- Brush or spoon melted chocolate into molds to coat evenly.
- Refrigerate 5–10 minutes, then repeat for a thicker shell.
- Gently remove set shells from molds.
- Fill half of the shells with 1 tsp cocoa mix and mini marshmallows.
- Warm the edge of an empty shell and press onto the filled half to seal.
- Use melted chocolate to close any gaps and secure the seal.
- Decorate with drizzled chocolate, sprinkles, or edible glitter.
- To serve: place a bomb in a mug, pour hot milk over, and stir to enjoy.
Notes
For vegan or dairy-free options, use non-dairy chocolate and substitute cocoa mix with coconut or almond milk powder. Store bombs in an airtight container at room temperature away from sunlight.
- Prep Time: 30 minutes
- Cook Time: 0 minutes
- Category: Dessert, Beverage
- Method: No Bake
- Cuisine: American
Nutrition
- Serving Size: 1 bomb with 1 cup milk
- Calories: 250
- Sugar: 28g
- Sodium: 60mg
- Fat: 12g
- Saturated Fat: 7g
- Unsaturated Fat: 4g
- Trans Fat: 0g
- Carbohydrates: 32g
- Fiber: 2g
- Protein: 4g
- Cholesterol: 5mg
Keywords: hot chocolate bombs, cocoa bombs, holiday treats, chocolate drink, DIY gifts
Table of Contents
What Are Hot Chocolate Bombs?
If you’ve never seen or tried a hot chocolate bomb before, you’re in for a real treat. These delightful chocolate spheres are hollow shells made from melted chocolate, carefully molded and filled with ingredients like cocoa powder, sugar, and mini marshmallows. When you pour hot milk over the bomb, the chocolate slowly melts away, releasing the fillings and transforming into a luscious cup of hot cocoa.
The popularity of hot chocolate bombs has skyrocketed in recent years, thanks to their appeal as both a culinary creation and a visual spectacle. Not only are they a delicious drink, but they’re also perfect for gifting, party favors, or even as a centerpiece for a dessert spread. What makes them truly special is how customizable they are—you can choose the type of chocolate, fillings, and decorations to suit your preferences or the occasion.

The Ingredients You Need for Perfect Hot Chocolate Bombs
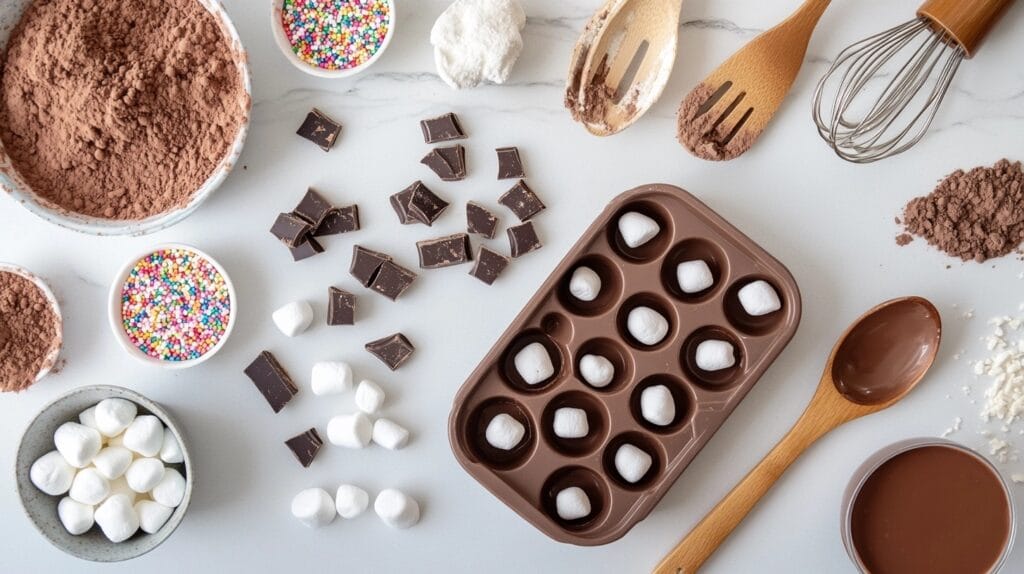
To get started with making your own hot chocolate bombs, you’ll need just a few key ingredients. Each of these ingredients plays an essential role, ensuring your bombs turn out both delicious and visually appealing. Additionally, selecting the right quality and combination of ingredients can significantly elevate the final result, making the process even more enjoyable.
Main Ingredients
First and foremost, you’ll need chocolate. The type of chocolate you choose will determine the flavor and texture of your bombs. For a classic taste, milk chocolate works beautifully, offering a sweet and creamy finish. If you prefer something richer, dark chocolate is an excellent option. White chocolate, on the other hand, provides a sweet base that pairs wonderfully with colorful decorations.
Next, you’ll need cocoa powder mix. You can use store-bought cocoa mix or create your own by blending cocoa powder, sugar, and a pinch of salt. The mix forms the core of your drink, so choosing a high-quality cocoa powder is essential.
Finally, mini marshmallows are a must-have filling. They not only add sweetness but also create that iconic “puff” when the bomb opens up in hot milk.
Optional Ingredients
For added flavor, consider including crushed peppermint candies, caramel bits, or a sprinkle of cinnamon. These small additions can make your hot chocolate bombs stand out. Additionally, sprinkles, edible glitter, or themed decorations can give your bombs a festive touch.
Pro Tip
For vegan or dairy-free options, replace the cocoa mix with a non-dairy alternative like coconut or almond milk powder. Similarly, use dairy-free chocolate to ensure everyone can enjoy these treats.
Essential Tools and Equipment for Making Hot Chocolate Bombs
Making hot chocolate bombs is easier when you have the right tools on hand. While you can get creative with household items, investing in a few specialized tools will make the process smoother and more enjoyable.
Types of Molds
Silicone molds are a popular choice for beginners. They’re flexible, affordable, and easy to work with, making them ideal for creating perfect chocolate spheres. If you’re looking to make multiple bombs at once or achieve a more polished finish, consider using 3-part molds. These molds offer precision and are great for bulk production. For professional-grade results, polycarbonate molds are a top pick due to their durability and ability to create seamless shells.
Other Tools
You’ll need heat-safe bowls for melting chocolate, silicone spatulas for stirring, and food-safe brushes for spreading chocolate evenly in the molds. A sturdy silicone mat or parchment paper will also come in handy for assembling and decorating your bombs.
Pro Tip
When choosing molds, go for food-safe options that are easy to clean and maintain. Durable molds not only save time but also help create consistent results every time you make hot chocolate bombs.

How to Make Hot Chocolate Bombs at Home
The process of making hot chocolate bombs can be broken down into a few simple steps. With that said, a little patience and practice will go a long way in helping you craft professional-looking treats. Furthermore, once you get the hang of it, the process becomes both enjoyable and rewarding.
Step 1: Melting the Chocolate
To start, melt your chocolate using one of two popular methods:
- Microwave Method: Heat the chocolate in 15-second intervals, stirring after each session to prevent burning. This method is quick and efficient for small batches.
- Double Boiler Method: For a more controlled approach, use steam to gently melt the chocolate. Place a heatproof bowl over a pot of simmering water, ensuring the bowl doesn’t touch the water. Stir continuously for a smooth and glossy finish.
Choose the method that works best for you based on the equipment you have and the amount of chocolate you’re working with.
Step 2: Preparing the Molds
Once your chocolate is melted, it’s time to prepare the molds:
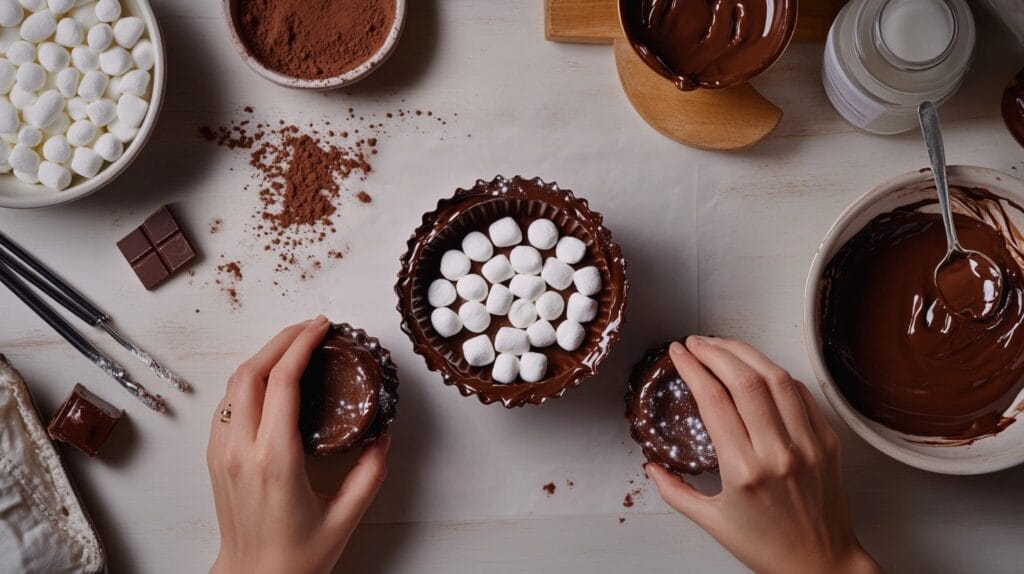
- Use a food-safe brush or spoon to apply a thin, even layer of melted chocolate to the molds.
- Place the molds in the refrigerator for 5–10 minutes to let the chocolate set.
- Repeat the process to create a second layer for thicker shells. This prevents cracking and ensures the spheres hold their shape during assembly.
Properly prepared molds are key to making durable and visually appealing chocolate bombs.
Step 3: Filling the Spheres
Now it’s time to add the delicious fillings:
- Carefully remove the chocolate shells from the molds. Handle them gently to avoid cracking.
- Fill one half of each sphere with about a teaspoon of cocoa powder mix and a handful of mini marshmallows.
- For added flavor, include extras like crushed peppermint candies, caramel bits, or a pinch of cinnamon.
Be sure not to overfill the shells, as this can make sealing them difficult.
Step 4: Sealing the Bombs
Sealing the chocolate spheres is a critical step:
- Warm the edge of an empty chocolate shell on a hot plate or a heated pan for a few seconds.
- Press the warmed edge onto the filled half to create a complete sphere.
- Use a small amount of melted chocolate to fill any gaps and ensure a secure seal.
Take your time during this step to ensure the finished bombs are neat and sturdy.
Decorating Your Bombs
Now for the fun part—decorating! Here are some ideas to make your bombs stand out:
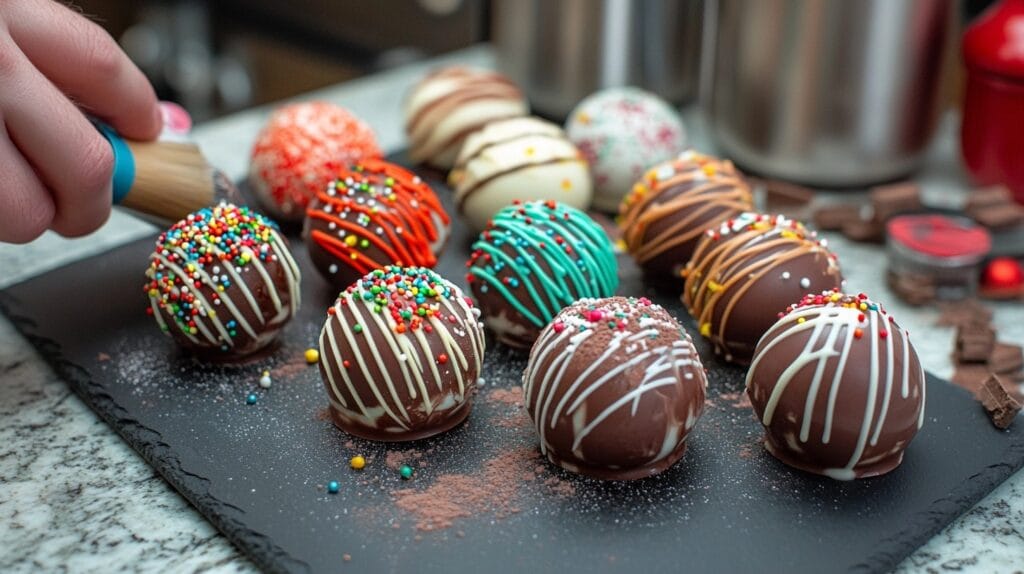
- Drizzle melted chocolate over the spheres in contrasting colors for a stylish effect.
- Add festive touches like edible glitter, sprinkles, or sugar art.
- Use food-safe paints to create themed designs for special occasions such as snowflakes for winter or hearts for Valentine’s Day.
Decorating is a great way to personalize your hot chocolate bombs and make them gift-worthy.
Troubleshooting Tips
Encountering issues? Here’s how to fix common problems:
Uneven Surfaces: Smooth out imperfections with a warm spoon or a dab of melted chocolate.
Cracked Shells: Ensure the chocolate layers are thick enough and refrigerate the molds between layers.
Difficulty Sealing: Use just enough heat to soften the edges without warping the shell.
Creative Variations to Try
Hot chocolate bombs are endlessly versatile, allowing you to get creative with flavors and designs.
White Chocolate Bombs
For a sweet and creamy alternative, use white chocolate as the base. Pair it with colorful sprinkles or edible glitter to create eye-catching designs.
Peppermint Cocoa Bombs
Crushed candy canes add a refreshing twist to your hot cocoa. Use peppermint-flavored chocolate drizzle for an extra festive touch.
Non-Dairy Options
Catering to dietary preferences? Use vegan chocolate and non-dairy milk powder to create plant-based bombs that everyone can enjoy.
How to Store and Serve Hot Chocolate Bombs
Proper storage is key to keeping your hot chocolate bombs fresh and ready to use. Store them in an airtight container at room temperature, away from direct sunlight. Avoid refrigerating the bombs, as this can cause condensation and affect the texture of the chocolate.
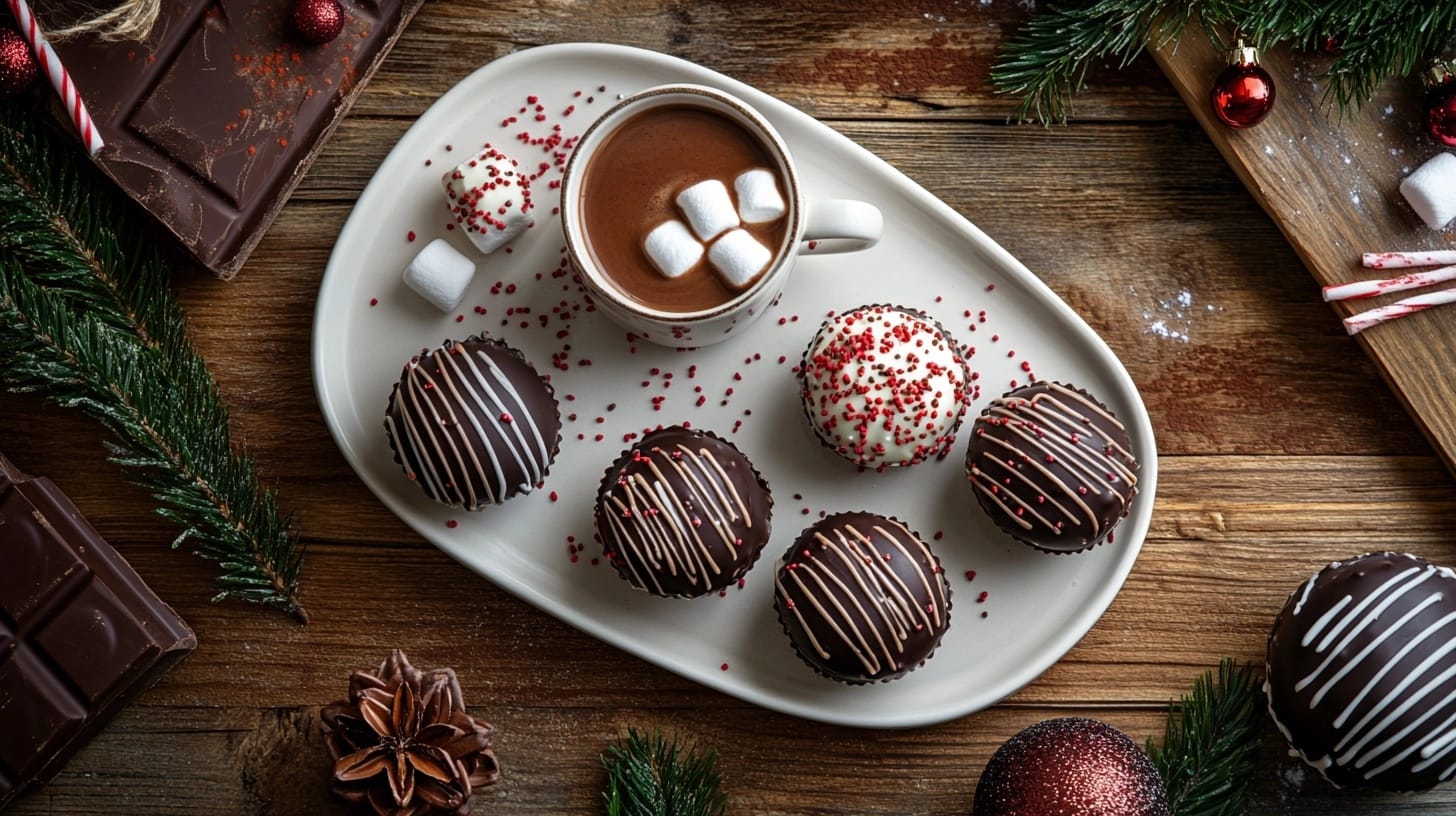
When it’s time to serve, simply place a bomb in a mug and pour hot milk over it. Watch as the chocolate melts and the marshmallows rise to the top—it’s as entertaining as it is delicious. For a complete indulgence, pair your cocoa bombs with desserts like Perfect Pairings for Your Hot Chocolate.
Hot Chocolate Bombs for Different Occasions
Hot chocolate bombs are versatile enough to suit any event or celebration. For holidays like Christmas, Valentine’s Day, or Thanksgiving, customize your bombs with seasonal colors and decorations. They also make great gifts for birthdays, anniversaries, and corporate events.
Planning a themed party? Create designs that match your theme, such as snowflakes for a winter gathering or pastel hues for a baby shower. The possibilities are endless!
The Benefits of Making Hot Chocolate Bombs at Home
There’s something incredibly satisfying about making your own hot chocolate bombs. Not only are they cost-effective compared to store-bought versions, but they also give you the freedom to experiment with flavors and designs. Plus, crafting these treats is a fun activity that can involve the whole family.
Tips for Professional-Quality Hot Chocolate Bombs
For a glossy finish, temper your chocolate before use. This process involves carefully heating and cooling the chocolate to achieve a smooth texture and shine. When it comes to molds, use high-quality options to ensure your shells are uniform and easy to assemble.
Pairing Your Cocoa Bombs with Other Treats
For a truly decadent experience, enjoy your hot chocolate bombs alongside desserts like Decadent Dessert Ideas to Complement Your Cocoa Bombs. For a healthier twist, try pairing them with Healthy Chocolate Treats for a Balanced Indulgence.

Fun Decorating Ideas for Hot Chocolate Bombs
Decorating your hot chocolate bombs is where you can let your creativity shine. Use colorful drizzles, edible glitter, or themed designs to make each bomb unique. For the holidays, try creating snowman faces or reindeer-themed bombs.
FAQ Section
How do hot chocolate bombs work?
Hot chocolate bombs are hollow chocolate spheres filled with cocoa powder, mini marshmallows, and other delicious ingredients. To use, you place the bomb in a mug and pour hot milk over it. The heat from the milk melts the chocolate shell, releasing the fillings and creating a rich, creamy hot cocoa. Stir well to combine everything for the perfect warm drink.
Do you put hot chocolate bombs in milk or water?
Hot chocolate bombs work best with milk because it adds creaminess and richness to the drink. However, you can also use hot water if you prefer a lighter beverage or need a dairy-free alternative. Non-dairy milk options like almond, soy, or oat milk are also great choices for a creamy, plant-based hot cocoa.
Should I refrigerate hot chocolate bombs?
It’s not recommended to refrigerate hot chocolate bombs. Refrigeration can cause condensation, which may lead to chocolate blooming (a white, powdery appearance) and alter the texture of the chocolate. Instead, store your bombs in an airtight container at room temperature in a cool, dry place away from direct sunlight.
Is it OK to eat a hot cocoa bomb?
Yes, you can eat a hot cocoa bomb as is! The chocolate shell and fillings are perfectly edible. However, the intended use is to dissolve the bomb in hot milk or water to create a delicious hot cocoa drink. Eating it directly can be a fun, sweet treat, but it may not provide the same cozy experience as enjoying it as a beverage.
Conclusion
Hot chocolate bombs are more than just a drink—they’re an experience that combines fun, creativity, and indulgence. Moreover, they add a touch of magic to any occasion, whether you’re enjoying them solo or sharing them with loved ones. Whether it’s for yourself, as a thoughtful gift, or to serve at a party, these treats are guaranteed to impress. In addition, they’re surprisingly easy to make and endlessly customizable, making them perfect for any skill level. So, are you ready to try your hand at creating these delightful treats? Don’t forget to share your creations, and meanwhile, check out more exciting recipes on Sista Recipes!

