
Introduction: A Perfect Blend of Indulgence and Simplicity
Desserts are the heart of every celebration. Whether it’s a cozy family dinner or a lavish party, they add joy to any occasion. Among all the treats, chocolate cheesecake mousse cups stand out for their indulgent flavor, creamy texture, and effortless preparation.
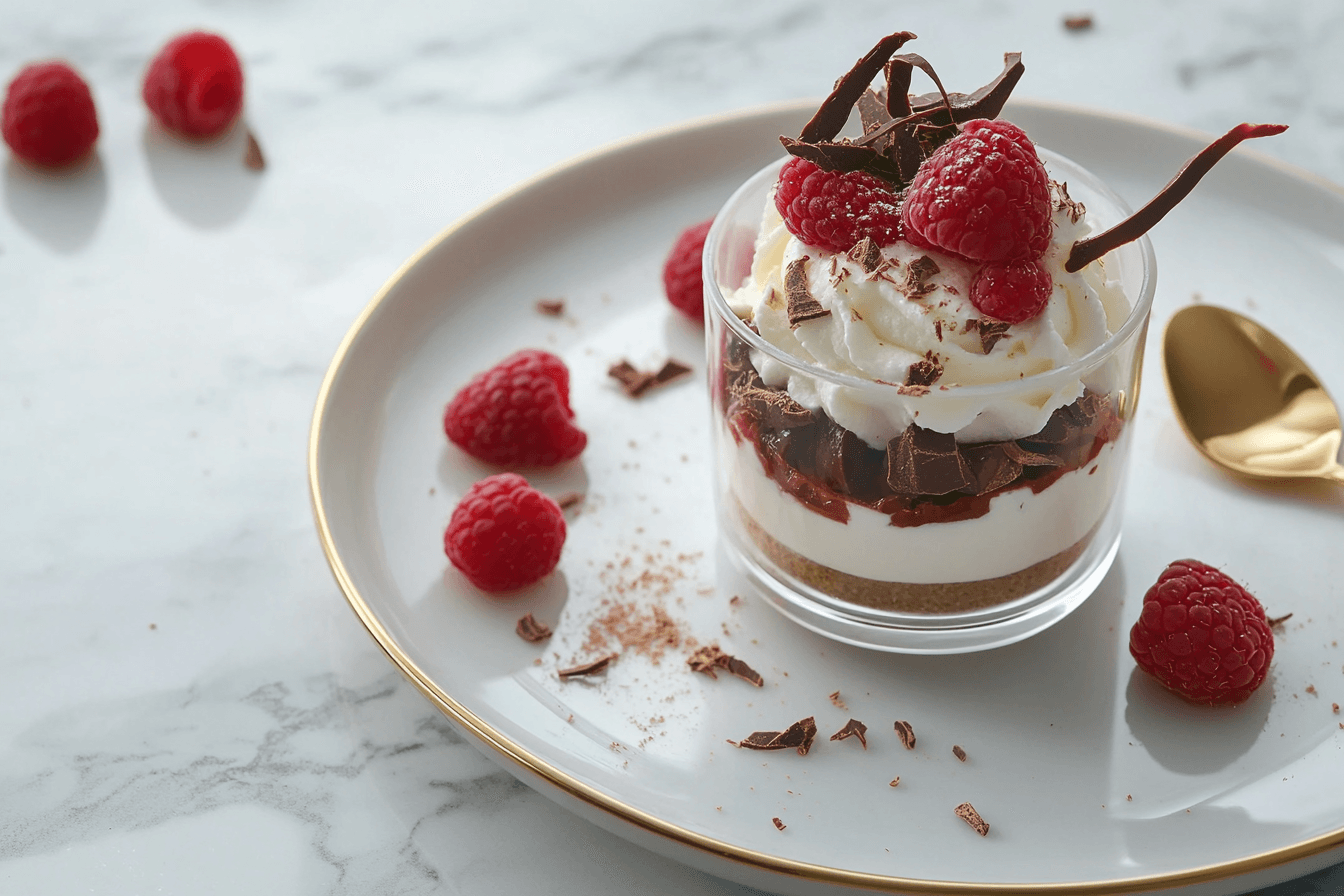
This no-bake dessert combines the tangy richness of cheesecake with the light, airy sweetness of mousse, creating a crowd-pleaser for every occasion. Topped with fresh berries, whipped cream, or chocolate curls, these mousse cups are as versatile as they are delicious.
Table of Contents
Why Chocolate Cheesecake Mousse is the Ultimate Dessert
Why settle for a dessert that’s just “okay” when you can create one that combines the best of two worlds? Chocolate cheesecake mousse is the ultimate treat, blending the rich, tangy flavor of cheesecake with the smooth, velvety texture of chocolate mousse. It’s a match made in dessert heaven.
This recipe is perfect for:
- Home Cooks looking for something special yet simple.
- Busy Parents who need a quick dessert that still wows the family.
- Baking Enthusiasts who enjoy experimenting with creative, layered treats.
The versatility of this dessert is another reason it’s a winner. You can serve it as-is, or dress it up with a variety of toppings like fresh raspberries, chocolate curls, or even a drizzle of ganache. Need inspiration?
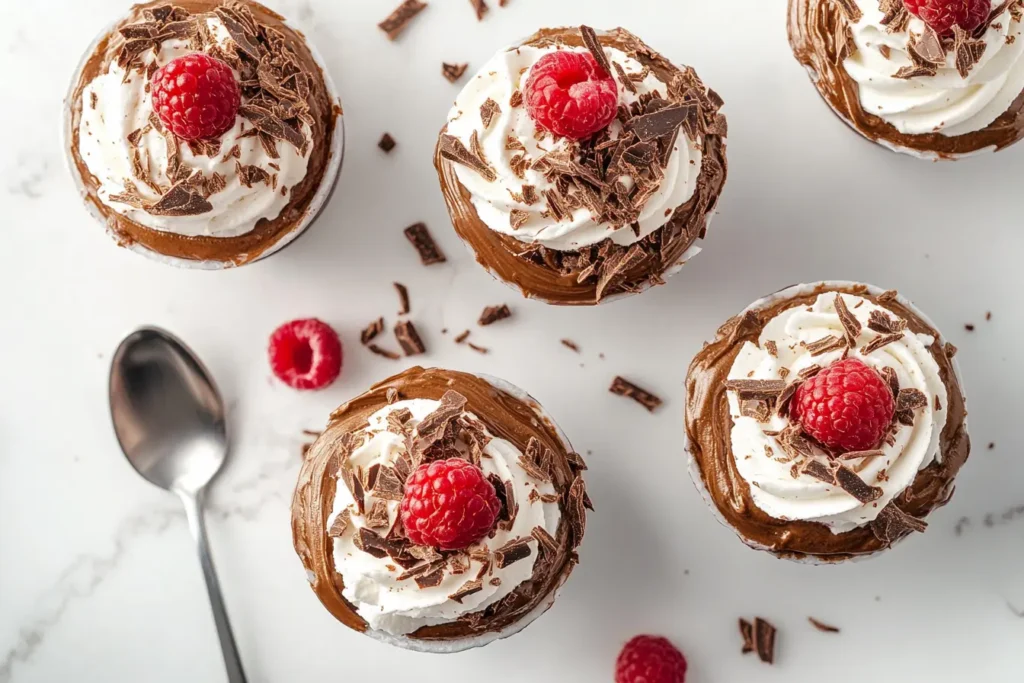
Chocolate cheesecake mousse cups are also incredibly portable and portion-friendly, making them perfect for parties and gatherings. Serve them in mini dessert cups, mason jars, or even shot glasses for an elegant presentation.
Whether you’re celebrating Valentine’s Day, hosting a dinner party, or simply treating yourself to something indulgent, this dessert guarantees smiles all around.For creative ways to top your mousse cups, explore Unique Toppings for Your Cheesecake Creations for inspiration.
Ingredients for Chocolate Cheesecake Mousse Cups
Here’s everything you’ll need to create these decadent mousse cups:
For the Mousse:
- 8 oz cream cheese (softened to room temperature for smooth blending)
- 1 cup semi-sweet chocolate chips (melted and slightly cooled)
- 1 ½ cups heavy cream (cold)
- ½ cup powdered sugar (sifted)
- 1 tsp vanilla extract
For the Toppings:
- 1 cup whipped cream (homemade or store-bought)
- Fresh berries (raspberries, strawberries, or blueberries)
- Chocolate curls or shavings (optional)
Optional Base Layer:
- 1 cup crushed Oreos or graham crackers (for a crunchy crust)
- 2 tbsp melted butter (to bind the crust together)
These ingredients are pantry staples for most dessert lovers, making this recipe even more convenient. Use high-quality chocolate to ensure the richest flavor in your mousse. Don’t have semi-sweet chocolate? Dark chocolate or even white chocolate will work beautifully as substitutions, offering different flavor profiles.
Step-by-Step Instructions for Chocolate Cheesecake Mousse
Creating chocolate cheesecake mousse cups is straightforward, with just a few simple steps:
Step 1: Prepare the Chocolate
- In a microwave-safe bowl, heat the semi-sweet chocolate chips in 20-second intervals, stirring after each session until melted and smooth.
- Allow the chocolate to cool slightly to prevent it from curdling when mixed with other ingredients.
Step 2: Whip the Cream
- In a chilled mixing bowl, whip the cold heavy cream using a hand mixer or stand mixer. Start on low speed, gradually increasing to medium-high until soft peaks form.
- Be careful not to over-whip, as this can lead to a grainy texture. Set the whipped cream aside.
Step 3: Make the Cheesecake Base
- In another bowl, beat the softened cream cheese, powdered sugar, and vanilla extract until the mixture is smooth and lump-free.
Step 4: Combine the Chocolate and Cream Cheese
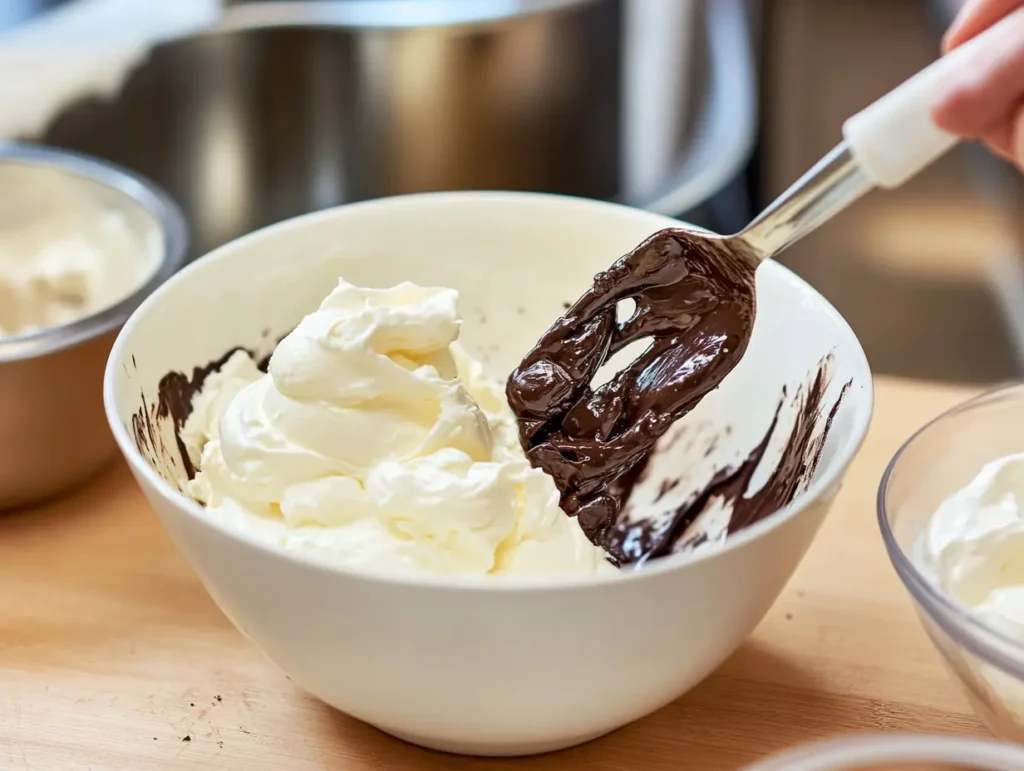
- Gradually fold the melted chocolate into the cream cheese mixture, ensuring that everything is well combined. The result should be a rich, chocolatey cheesecake filling.
Step 5: Fold in the Whipped Cream
- Gently fold the whipped cream into the chocolate cheesecake mixture in batches. This ensures the mousse remains light and airy.
Step 6: Assemble the Cups
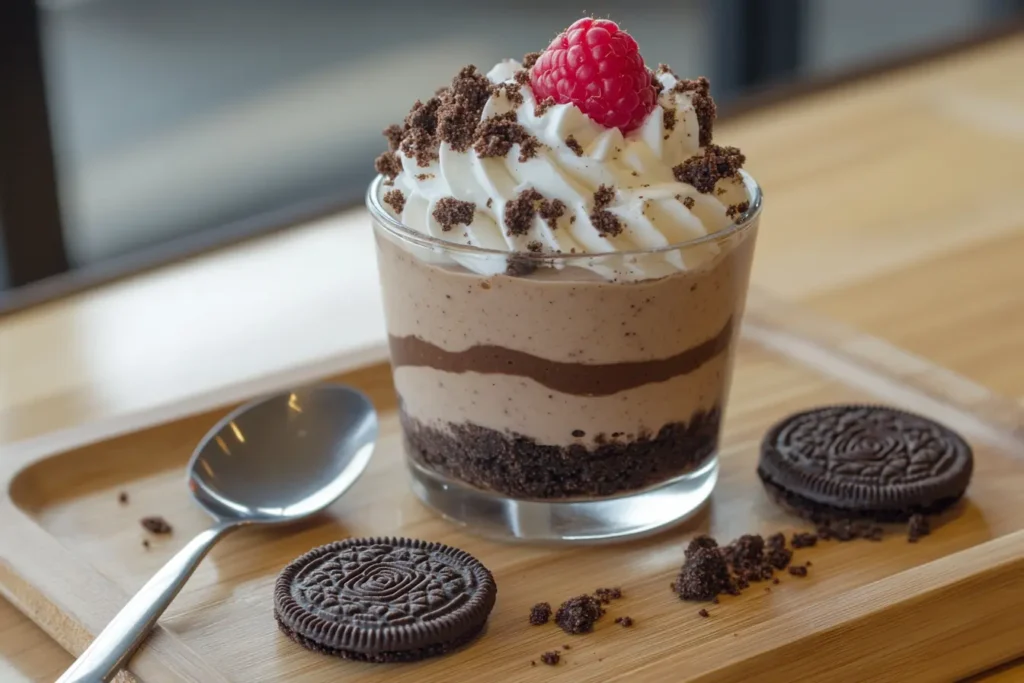
- If using a crust, mix the crushed Oreos or graham crackers with melted butter and press a thin layer into the bottom of each serving cup. Refrigerate for 10 minutes to set.
- Pipe or spoon the mousse into the cups, leaving room for toppings.
Step 7: Chill and Serve
- Refrigerate the assembled cups for at least 2 hours before serving. This helps the mousse set and enhances the flavors.
- Top with whipped cream, fresh berries, and chocolate shavings just before serving.
This step-by-step process ensures you achieve the perfect consistency and presentation for your mousse cups every time.
Serving Suggestions and Topping Ideas
When it comes to desserts, presentation is everything. These chocolate cheesecake mousse cups aren’t just about flavor—they’re a feast for the eyes as well. Whether you’re serving them for a romantic dinner or a fun family gathering, a little extra effort with the toppings goes a long way.
Classic Toppings
- Fresh Berries: A handful of raspberries, strawberries, or blueberries adds vibrant color and a fresh, tangy contrast to the rich mousse.
- Whipped Cream Swirls: Pipe dollops of whipped cream on top for a soft, cloud-like finish. Use a star-shaped piping tip for a professional touch.
- Chocolate Curls or Shavings: Sprinkle some curls or finely shaved chocolate for an elegant and decadent look. You can make these by using a vegetable peeler on a chocolate bar.
- Dusting of Cocoa Powder: Lightly sift cocoa powder over the top for a simple, café-style presentation.
Creative Serving Ideas
- Serve the mousse in mini mason jars for a rustic, Instagram-worthy vibe.
- Use fancy martini glasses or wine glasses for an elegant dinner-party presentation.
- For a kid-friendly twist, layer the mousse with crushed cookies or chocolate chips in clear plastic cups.
Themed Variations
- Holiday Twist: Add crushed candy canes or peppermint bark for a festive Christmas dessert.
- Valentine’s Day Special: Shape chocolate hearts using a mold and place them on top of the mousse for a romantic touch.
- Summer Fresh: Incorporate tropical fruits like mango or passion fruit as a topping for a refreshing summer treat.
The beauty of this dessert lies in its adaptability. Whether you’re aiming for elegance, playfulness, or bold flavors, these serving ideas make your chocolate cheesecake mousse cups truly unforgettable. For themed variations like holiday-inspired garnishes, explore How to Make Pumpkin Cheesecake Cookies.
Tips for the Best Chocolate Cheesecake Mousse
Even simple recipes like this one benefit from a few expert tips to ensure perfect results every time. Here’s how to make sure your chocolate cheesecake mousse turns out just right:
1. Use High-Quality Ingredients
The quality of your chocolate directly affects the flavor of the mousse. Choose high-quality semi-sweet chocolate or dark chocolate for a deep, rich taste. Similarly, fresh heavy cream and full-fat cream cheese yield the creamiest texture.
2. Soften the Cream Cheese Properly
Cold cream cheese can result in lumps, which are difficult to eliminate once mixed. Allow the cream cheese to come to room temperature for about 30 minutes before using.
3. Melt the Chocolate Gently
Overheating chocolate can cause it to seize and turn grainy. Use the microwave in short intervals or melt it over a double boiler for smoother results.
4. Fold, Don’t Mix
When incorporating the whipped cream into the cheesecake mixture, use a gentle folding motion rather than stirring. This preserves the airiness of the mousse, giving it that light, fluffy texture.
5. Chill Thoroughly
The mousse needs time to set and develop its flavors, so don’t skip the chilling step. A minimum of 2 hours in the fridge is ideal, but overnight chilling works even better.
6. Don’t Over-Whip the Cream
Over-whipped cream can become stiff and grainy, which affects the overall texture of the mousse. Stop whipping as soon as soft peaks form.
7. Plan Ahead for Serving
If you’re preparing these for a party, assemble the mousse cups a day in advance, but add toppings like whipped cream and berries just before serving to keep them fresh and vibrant.
These tips ensure your dessert will look and taste amazing every time, making you feel like a professional pastry chef in your own kitchen. Learn about proper chocolate techniques with How to Temper Chocolate for Desserts.
No-Bake Desserts: The Busy Cook’s Best Friend
No-bake desserts are a game-changer for anyone who loves sweets but doesn’t always have the time—or energy—to bake. Chocolate cheesecake mousse cups are the perfect example of how no-bake recipes can save the day.
Why No-Bake Works
- Convenience: No need to preheat the oven or worry about baking times.
- Time-Saving: With minimal prep and no baking required, you can focus on other dishes or activities while the dessert sets in the fridge.
- Perfect for Any Season: No-bake desserts are especially great in the summer when you want to avoid heating up your kitchen.
Other No-Bake Ideas to Try
Looking to expand your dessert repertoire? Here are some other no-bake favorites:
- Oreo Truffles: Crushed Oreos mixed with cream cheese and coated in chocolate.
- No-Bake Cheesecake Bars: A graham cracker crust topped with creamy cheesecake filling.
- Fruit and Yogurt Parfaits: Layers of Greek yogurt, fresh fruit, and granola.
Chocolate cheesecake mousse cups take the crown as one of the easiest no-bake desserts, with a gourmet flair that’s hard to beat.
Variations of Chocolate Cheesecake Mousse Cups
The best thing about chocolate cheesecake mousse cups is how easy it is to tweak them to suit different preferences. Here are some creative variations:
1. Oreo Crust Base
If you love a bit of crunch, add a crust to your mousse cups. Mix crushed Oreos with melted butter and press them into the bottom of each cup. Chill for 10 minutes before adding the mousse.
2. Add Ganache Layers
Take decadence to the next level by layering your mousse with chocolate ganache. To make ganache, combine equal parts heavy cream and chocolate, heat until melted, and stir until smooth.
3. Experiment with Chocolate Types
Switch up the chocolate to create different flavors. Use white chocolate for a sweeter, creamier mousse or dark chocolate for a bolder, richer taste.
4. Fruity Layers
Incorporate a layer of fruit compote or puree—raspberry, strawberry, or even mango—to add a refreshing and tangy contrast to the mousse.
5. Boozy Mousse
For an adult twist, add a tablespoon of Baileys, Kahlúa, or Grand Marnier to the cheesecake mixture.
6. Festive Decorations
Customize the mousse cups for different holidays. Add crushed candy canes for Christmas, chocolate eggs for Easter, or heart-shaped sprinkles for Valentine’s Day.
Storing and Making Ahead
Chocolate cheesecake mousse cups are not only delicious but also incredibly convenient when it comes to storage and preparation. Whether you’re planning a dinner party or meal-prepping a few desserts for yourself, this recipe can be made ahead of time and stored with ease.
Refrigeration Tips
- Once assembled, mousse cups can be stored in the refrigerator for up to 3 days. Cover each cup tightly with plastic wrap or foil to keep them fresh.
- If you’re prepping for an event, assemble the mousse a day in advance but leave the toppings—such as whipped cream and fresh berries—until just before serving. This keeps the toppings vibrant and prevents them from wilting or losing texture.
Freezing Mousse Cups
While not ideal, these mousse cups can be frozen if necessary. Freezing may slightly affect the texture, making the mousse a bit denser, but the flavor will remain intact.
- To freeze, wrap each cup tightly with plastic wrap, then place them in an airtight container to avoid freezer burn.
- Thaw the mousse in the refrigerator for several hours before serving. Add the toppings after thawing for the best presentation.
Make-Ahead Tips for Parties
Hosting a large gathering? Here’s how to streamline the process:
- Prepare the mousse and assemble it into serving cups a day before the event.
- Keep the cups refrigerated until serving time.
- Offer a DIY topping station with bowls of whipped cream, fresh berries, chocolate curls, and other garnishes. This not only saves time but also adds an interactive element for guests to customize their dessert.
By following these storage and prep tips, you can focus more on enjoying your event and less on last-minute kitchen tasks. Plus, this make-ahead dessert is always a crowd-pleaser!
Nutritional Information and Dietary Adjustments
Desserts are meant to be enjoyed, but it’s always nice to know what’s in your food, especially if you have dietary restrictions. Below is a breakdown of the nutritional content for a standard serving of chocolate cheesecake mousse cups, along with tips for adjusting the recipe to suit different diets.
Approximate Nutrition Per Serving (1 Cup):
- Calories: 320
- Fat: 22g
- Carbohydrates: 25g
- Protein: 5g
- Sugars: 18g
Dietary Adjustments
- Gluten-Free Option:
Skip the crust layer or use gluten-free cookies for a base. Ensure your chocolate chips are labeled gluten-free as well. - Low-Sugar Option:
Use a sugar substitute like erythritol or stevia in place of powdered sugar. Opt for sugar-free chocolate chips to reduce overall sugar content. - Dairy-Free Alternative:
Replace cream cheese with a dairy-free version, such as a cashew-based cream cheese. Use coconut cream instead of heavy cream to maintain the creamy texture. - Keto-Friendly Version:
Use low-carb sweeteners and dark chocolate with a high cacao content (at least 70%) to keep the net carbs low.
By making these adjustments, you can cater this recipe to a wide range of dietary needs while maintaining its deliciousness. Whether you’re indulging or staying mindful of your diet, these chocolate cheesecake mousse cups offer something for everyone.
FAQs
1. What is Philadelphia Chocolate Cheesecake Mousse?
Philadelphia chocolate cheesecake mousse refers to a creamy dessert made with Philadelphia cream cheese, blended with chocolate, and whipped into a light, mousse-like consistency. It’s a no-bake dessert that combines the tanginess of cream cheese with the richness of chocolate, making it an easy yet indulgent treat.
2. How do I make an Easy Chocolate Cheesecake Mousse?
To make an easy chocolate cheesecake mousse, you’ll need softened cream cheese, melted chocolate, whipped cream, powdered sugar, and vanilla extract. Simply blend the cream cheese and sugar until smooth, fold in the melted chocolate, and gently incorporate the whipped cream. Chill for at least two hours before serving. This no-bake recipe is quick, simple, and perfect for beginners.
3. Is there a recipe for Chocolate Mousse Cheesecake No Bake?
Yes! A no-bake chocolate mousse cheesecake combines a cookie crust (like Oreos or graham crackers) with a cheesecake layer and a mousse topping. Simply prepare each layer individually: press the cookie crust into a pan, layer on a cream cheese-based cheesecake mixture, and finish with chocolate mousse. Refrigerate until firm, and serve chilled.
4. Can I make Chocolate Cream Cheese Mousse without Whipping Cream?
Yes, you can make chocolate cream cheese mousse without whipping cream by substituting it with ingredients like full-fat Greek yogurt or coconut cream. Another option is to blend softened cream cheese with melted chocolate and powdered sugar for a denser, cheesecake-like texture. While it won’t be as airy as traditional mousse, it will still be rich and delicious.
5. Can I make this dessert dairy-free?
Absolutely! Use dairy-free cream cheese and replace heavy cream with coconut cream or a plant-based whipping cream. Opt for vegan chocolate to ensure the entire dessert is dairy-free.
Conclusion: A Dessert Worth Indulging In
Chocolate cheesecake mousse cups are the epitome of a perfect dessert: rich, creamy, and effortlessly elegant. They combine the best of two classic desserts—cheesecake and mousse—into a treat that’s as impressive as it is easy to make.
Whether you’re a seasoned baker or a beginner in the kitchen, this no-bake recipe is accessible to everyone. The velvety mousse, topped with fluffy whipped cream and fresh berries, creates a harmony of textures and flavors that’s sure to please any crowd. Plus, the versatility of this dessert means you can customize it for any occasion, from casual dinners to formal celebrations.
So, what are you waiting for? Gather your ingredients, whip up these delightful mousse cups, and let Sista Recipes help you create magical moments around the table. Don’t forget to experiment with toppings and share your unique creations with us—we love hearing how you put your personal touch on our recipes!
Print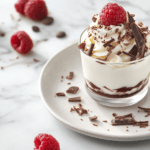
10 Irresistible Chocolate Cheesecake Mousse Cups for Every Occasion
- Total Time: 25 minutes
- Yield: 6 servings 1x
- Diet: Vegetarian
Description
Rich, creamy, and indulgent, these no-bake chocolate cheesecake mousse cups are the perfect dessert for any occasion. Made with cream cheese, melted chocolate, and whipped cream, they’re easy to prepare and can be topped with fresh berries, chocolate curls, or your favorite garnishes.
Ingredients
For the Mousse:
- 8 oz cream cheese (softened)
- 1 cup semi-sweet chocolate chips (melted and slightly cooled)
- 1 ½ cups heavy cream (cold)
- ½ cup powdered sugar (sifted)
- 1 tsp vanilla extract
For the Toppings:
- 1 cup whipped cream (homemade or store-bought)
- Fresh berries (raspberries, strawberries, or blueberries)
- Chocolate curls or shavings
Optional Crust:
- 1 cup crushed Oreos or graham crackers
- 2 tbsp melted butter
Instructions
- Melt the Chocolate: In a microwave-safe bowl, melt the semi-sweet chocolate chips in 20-second intervals, stirring between each, until smooth. Let it cool slightly.
- Whip the Cream: In a chilled bowl, whip the heavy cream until soft peaks form. Set aside.
- Make the Cheesecake Base: In another bowl, beat the softened cream cheese, powdered sugar, and vanilla extract until smooth.
- Combine Chocolate and Cream Cheese: Gently fold the melted chocolate into the cream cheese mixture until fully combined.
- Incorporate Whipped Cream: Fold the whipped cream into the chocolate-cheesecake mixture in batches to maintain the airy texture.
- Assemble the Cups: Add crushed Oreos or graham crackers (if using) as a base layer in each serving cup. Pipe or spoon the mousse into the cups, leaving space for toppings.
- Chill and Serve: Refrigerate for at least 2 hours. Top with whipped cream, fresh berries, and chocolate shavings before serving.
Notes
- Use high-quality chocolate for the best flavor.
- Ensure cream cheese is at room temperature to avoid lumps.
- Whipped cream should not be over-whipped; stop at soft peaks.
- Store mousse cups in the fridge for up to 3 days.
- Prep Time: 25 minutes
- Cook Time: 0 minutes
- Category: Dessert
- Method: No-Bake
- Cuisine: American
Nutrition
- Serving Size: 1 cup
- Calories: 320
- Sugar: 18g
- Sodium: 125mg
- Fat: 22g
- Saturated Fat: 13g
- Unsaturated Fat: 6g
- Trans Fat: 0g
- Carbohydrates: 25g
- Fiber: 2g
- Protein: 5g
- Cholesterol: 65mg
Keywords: Chocolate cheesecake mousse, no-bake desserts, creamy chocolate mousse, easy mousse recipe, whipped cream desserts